


March Soap Challenge - Phoenix (Clamshell Swirl)

Wow!
This month's soap challenge was pretty tough. The challenge was to make a soap entirely with the clamshell swirl. You can find my entry here.
The quick how-to for clamshell swirling:
- Pour two or more colors of soap batter into a single pitcher, side by side.
- Pour the colorful soap into one part end of the mold while wiggling it just a little for a set amount of time (5-10 seconds).
- Repeat step two in two other spots on the end of the mold (i.e. left then right then middle).
- Repeat steps 2 and 3 over and over until the mold is full.
Sounds simple, right? Yeah, that's what I thought, too.
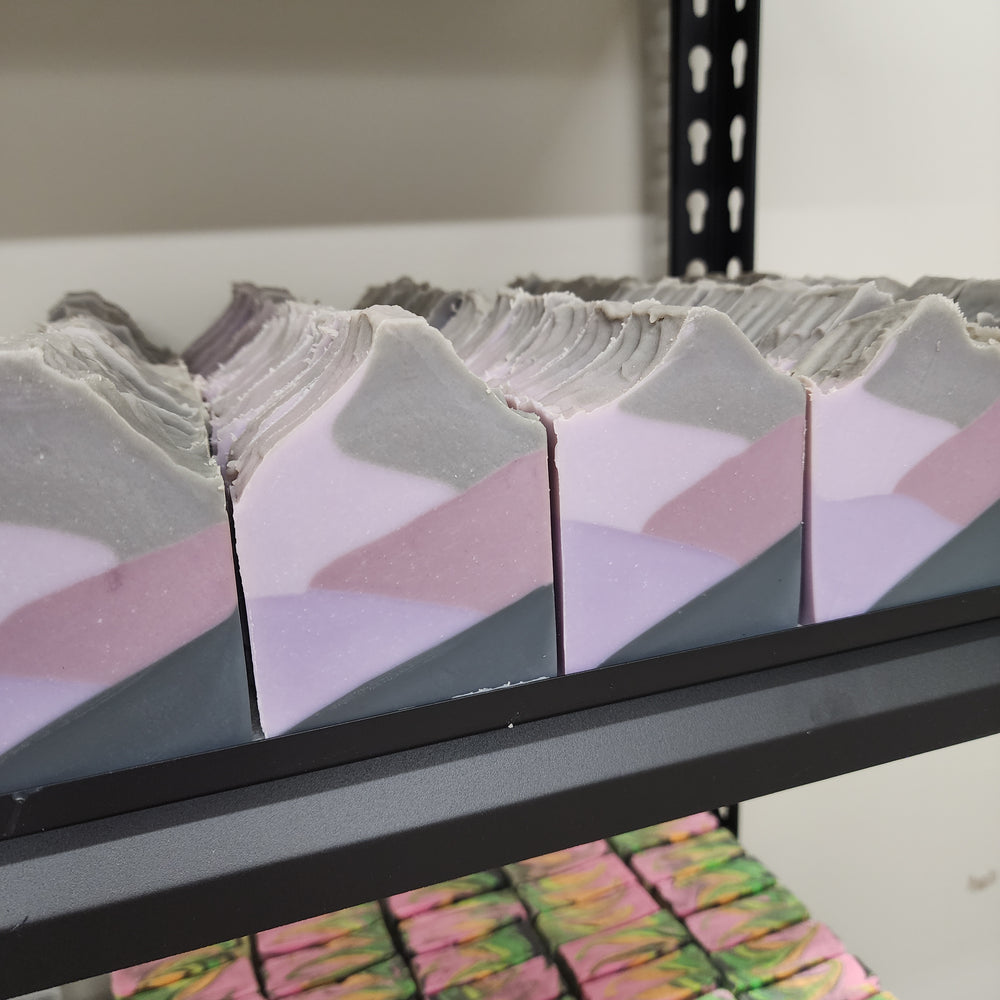
I decided to make my soap using a black amber musk fragrance. To complement the black amber, I decided to use the colors black, grey, red, and orange. The problem with four colors is that it is impossible to pour them side by side in one pitcher. To get around that, I poured two and squirted two.
First, I prepared all of my colors. The black and grey were prepared in 4 cup pitchers. The red and orange were prepared in squirt bottle. I used black iron oxide, Really Red, and Orange Vibrance from Nurture Soap along with Pewter Silver from Bramble Berry.

After mixing up the batter just enough (still very runny), I ladled a couple ounces into each squirt bottle and split the rest between the two pitchers.

I grabbed my long funnel pitcher and poured the black and grey in at the same time from opposite sides, getting them as even as possible.

Then, I squirted a stripe of orange over the grey and a stripe of red over the black.

Next, I started pouring and wiggling! I had to be fast and focused, so I don't have pictures of this part of the process inside the mold. I do have this picture of the pitcher after one pour so you can see how the colors look coming out of the funnel:

Here's a picture of the top once I was done the second loaf, though. Yes, this challenge took two tries.

There were a number of hurdles. First, my batter was too thin. The colors started mixing together. I had to stop and let the soap get thicker. Then, I had a hard time getting the "clamshell" I was pouring to push back the clamshells behind it. It took me a while to figure out that I was pouring too gently. This pour needed some help from gravity, so I had to start pouring faster and at a greater angle.
Below, you can see both ends of my first loaf. The end on the left is a muddy-looking mess. By the time I got to the other end on the right, I felt like I was getting the hang of it. Alas, this challenge required three good bars for the entry picture, and I only had two I felt proud of.

Here are the final results, below. The bar on the left is batch 2 and the bar on the right is batch one. Relative success! Is is perfect? Of course not. Am I still really stinkin' proud of it? You betcha! A Facebook survey resulted in the name Phoenix, and bars are now for sale here..

I decided to submit batch 2 because the clamshells are more distinct and the loaf was more consistent. Strangely, no matter how I poured (referring both to pouring into the pitcher and to pouring into the mold), the orange and red wound up primarily on top. I will have to experiment with this more in the future.


Your color results are so interesting! I love the effect you achieved. I’ve been wanting to experiment and see where the colors end up using different pouring techniques. Your clamshells are beautiful with great definition!
These are awesome! This challenge was most definitely a challenge! You did a fantastic job!
Phoenix is a very fitting name. Your soap looks great.
Fascinating results, Danielle!! I was trying to figure out where the red and orange went! Very beautiful clam shells throughout though. And only two tries! :)
Leave a comment